Fall 2022 Children's Announcements: Publishers M-Q


How To Complete Bounty Hunter In MW3 Zombies
The Bounty Hunter mission in Call of Duty: Modern Warfare 3 Zombies can take some time to complete. You'll be hunting for specific enemies as you explore the map, but you also want to make sure you're grabbing the correct contract for this mission.
Don't expect to complete the Bounty Hunter quest without the contracts on your account. It's all tied to the randomly generated missions you can find while exploring Zombies, which might be your biggest hang-up. Here's what you need to know about how to complete Bounty Hunter in MW3 Zombies.
All Bounty Hunter quest steps in MW3 Zombies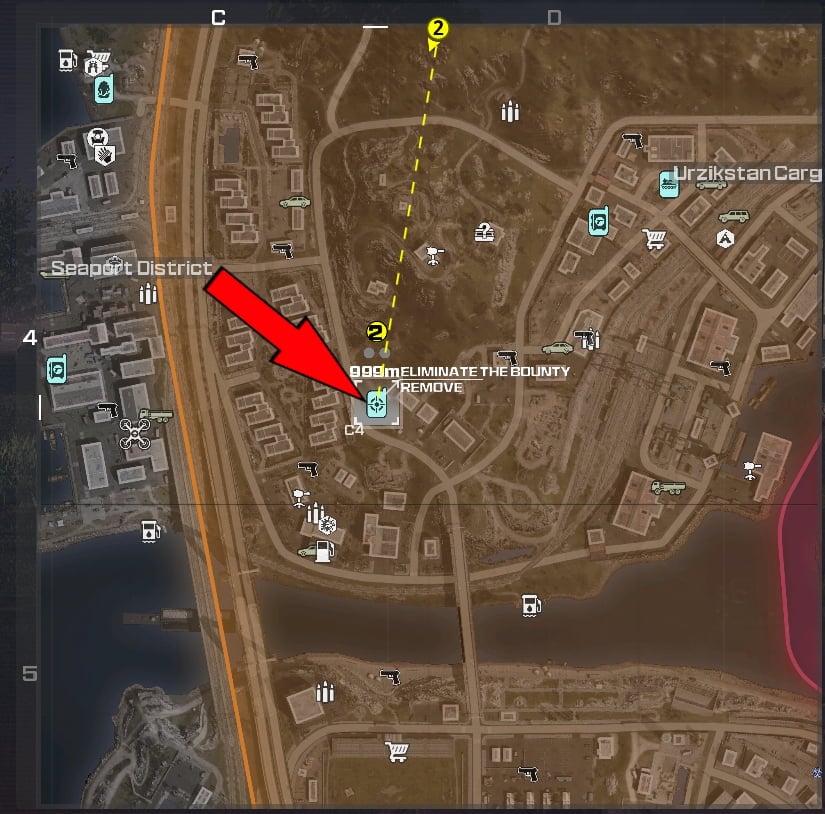 Finding a Bounty Contract in MW3 Zombies. Screenshot by Dot Esports
 Bounty Hunter is an act two mission and requires you to complete a Bounty Contract on the Disciple, Mangler, and the Mimic. These bounty contracts can be at any level and appear throughout the MW3 Zombies map.
These are all the steps you need to complete Bounty Hunter in MW3 Zombies.
A Bounty Contract will have a crosshair symbol on your map. Make sure you mark it before trying to track it down, and then grab it before another player team can acquire it. Accepting the Bounty Contract will give one of the three special zombies: a Disciple, a Mangler, or a Mimic. You'll receive the target's location around the area highlighted on your map. You'll then have to defeat the target and receive a reward for completing the contract.
Unfortunately, it's random on which of those three special zombies you'll get when you accept a Bounty Contract. Because of the random generation of these contracts, it might take some time to acquire all three unique contracts in MW3 Zombies.
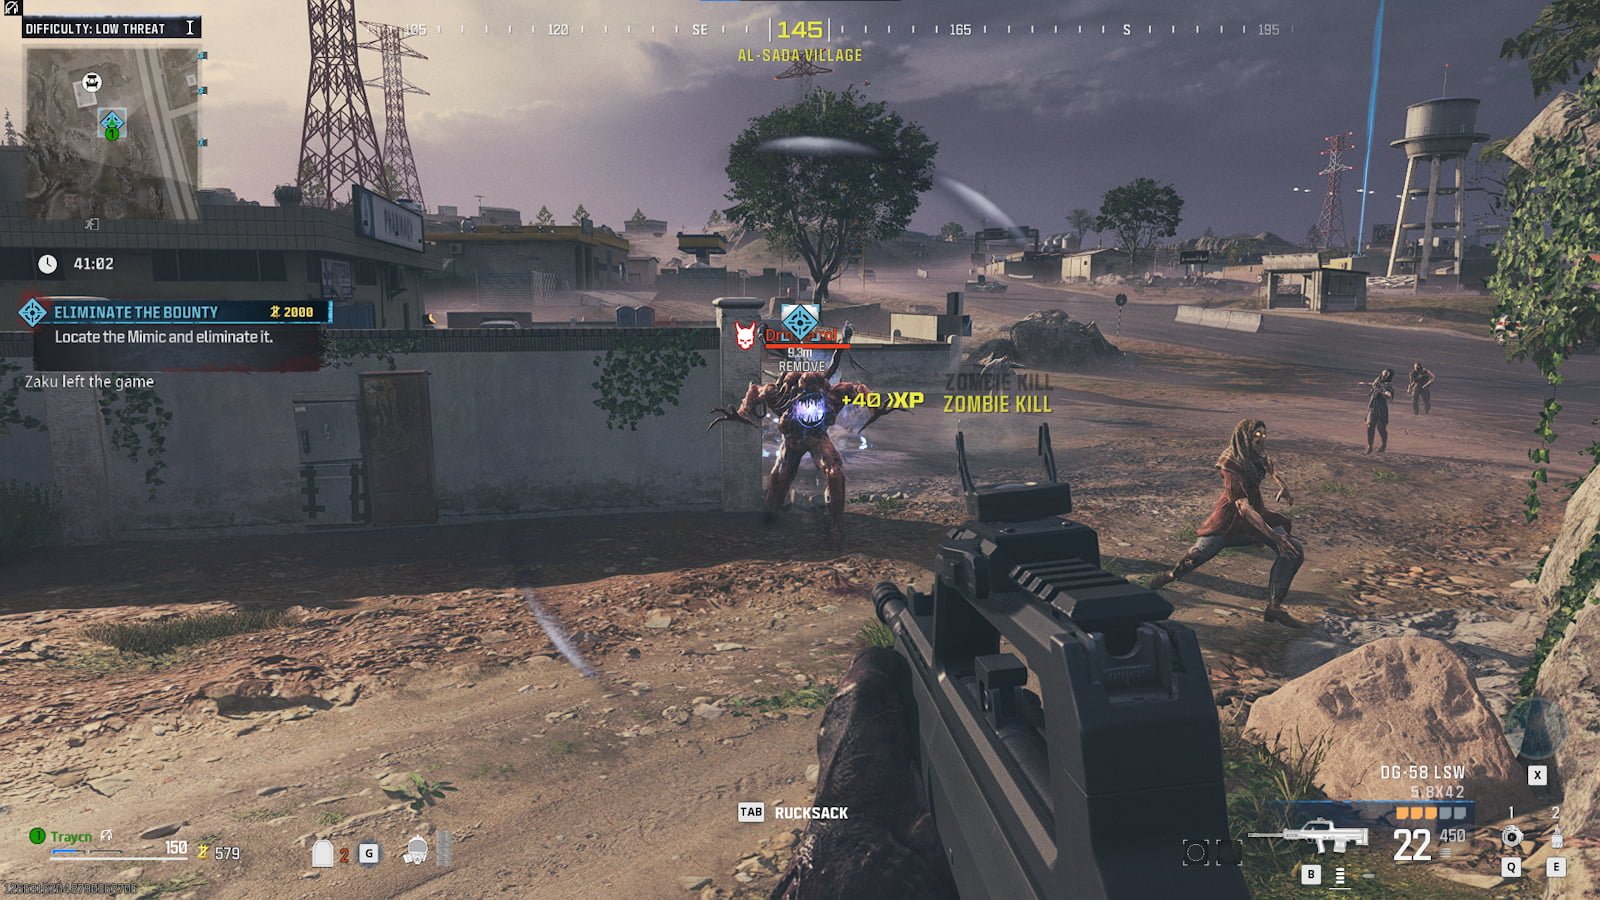 Fighting a Mimic in MW3 Zombies. Screenshot by Dot Esports
 To make short work of these contracts, I recommend sticking to the outer layer of the MW3 Zombies map. These are the easier contracts in the game, and you won't need to have a Pack-A-Punch weapon to take out the hordes of enemies or the special zombies you'll need to take out to complete Bounty Hunter. This is a great way to make short work of this mission and advance to the next series of tasks.
How To Get Crossbow In MW3 Zombies (MWZ)
The Crossbow in MW3 Zombies is an absolute beast of a weapon. It'll guarantee to mow through everything from Mega Abominations to armored without a single problem. However, it isn't too easy to find and will take some work.
The first way to get it, and one that will guarantee it in your MW3 Zombies arsenal, is by simply unlocking the crossbow in multiplayer. To unlock the Crossbow, you will need to get 50 longshot kills with a Marksman Rifle. However, if you don't want to grind that out, it is also actually available in-game.
To get your hands on the Crossbow, you're going to have to make your way deep into the tier 3 zone. Here you will need to search mercenary crates in the hope that you manage to find the weapon. Tier 3 zones are full of the hardest enemies, including the Mega Abomination and some seriously high-level zombies. So, make sure you are geared up the eyeballs with pack-a-punched weapons and plenty of perks.
To keep the weapon, you will need to exfil with it. Only then can it be used in future runs. Getting your hands on it is one thing. Actually surviving the ordeal is another.
If you don't fancy actually making the effort and heading all the way to the Tier 3 zone, you can also use a friend. If one of your friends has unlocked the Crossbow in MW3 Zombies, they can bring it in for you. They simply need to drop the weapon, and you can then pick it up and use it.
The crossbow is a wonderfully overpowered weapon in Zombies and makes short work of even the hardest enemies. The BrightBlaze bolts use thermite to constantly damage enemies. This means you can simply fire and forget as you collect more plates or deal with the other hordes.
Other Modern Warfare Zombies articles
Modern Warfare 3 Zombies: Mercenary Convoy Guide
The old format of Zombies has been left behind in Call of Duty: Modern Warfare 3 in favor of a more open-world, objective-based take on the undead survival game type. This time, you will squad up and drop into a map with specific objectives you can choose to complete to earn tons of XP, while also pushing the narrative forward and unlocking new, more difficult tasks to take on. The early-tier missions are generally very simple, but in Act 1, you will be given the objective to find and destroy a Mercenary Convoy somewhere on the map. This sounds easy enough on paper until you realize you have no idea where this convey is or how to find it. Every run in Zombies risks losing all your hard-earned progress, so we'll lead you to the Mercenary Convoy to take it out before the zombies even know you were there.
Your first challenge will be to find this Mercenary Convoy. The problem here is twofold: first is that it isn't marked on your map in any way, and second is that, being a convoy, it is mobile. Once you land, you and your team should find the nearest vehicle and head toward the center of the map. Depending on how the threat levels are on your particular map, you are looking for roads and highways that are around the medium-threat level zone. You will have to patrol these roads until you come across the convoy, which only consists of three vehicles. Once you are in range, it does appear on your map to let you know you've found it.
Once you've managed to track down the convoy, your next task is to destroy it. This is not an easy task without getting some good gear, and ideally some explosives. The mercs inside aren't going to go down without a fight, and it would be a shame to die after going through all the trouble to find them. The cars are all armored, so anything but explosives will do little to no damage.
Once you begin the assault, make sure you destroy all the vehicles and take out the mercenary leader. Once it's safe, go in and loot the stronghold keycard off the leader's body. This will officially complete this part of the mission. You should also take a moment to loot the convoy you just attacked for some high-tier goodies, even after the vehicle is busted.
All that's left is for you to extract alive and you'll be clear to move on to the next set of missions.
Editors' Recommendations


Comments
Post a Comment